
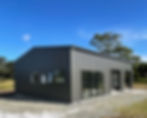
Budget Weatherproofing: 7 Low-Cost Fixes to Winter-Ready Your Shed in NZ
- Anchored Steel
- 15 hours ago
- 11 min read
Most NZ shed problems don't show up in summer, they show up in the first week of winter. The good news: the seven fixes that prevent 90% of winter shed damage cost less than $500 combined, and most can be done in a weekend.
Whether you have an older lifestyle shed, a farm workshop, or a steel shed that's starting to show its age, this guide covers exactly what to check, what to fix, and what to do when a repair goes beyond a weekend project.

How Do You Weatherproof a Shed in New Zealand?
To weatherproof a shed in NZ for winter, focus on the four main failure points: the roof (leaks and condensation), the doors and walls (draught and water ingress), the gutters and drainage (overflow and ponding), and the floor perimeter (groundwater wicking). A combination of sealing, ventilation, and protective coatings addresses all four at low cost.
To weatherproof a shed in NZ: seal roof flashings and laps with butyl tape or roofing sealant, install door draught seals, clear and extend gutters, apply rust-inhibiting primer to any corroded cladding, add ridge venting to reduce condensation, seal the concrete floor perimeter, and insulate the roof space. These seven fixes address the most common winter failure points for NZ sheds at minimal cost.

The 7 Fixes at a Glance: Cost & Winter Impact
Here's a summary of all seven fixes before we break each one down in detail.
Fix | Est. Cost (NZD) | Winter Impact |
Seal roof flashings & laps | $15–$40 | Stops leaks at most common failure points |
Install door draught seals | $20–$60 | Reduces wind-driven rain ingress & heat loss |
Clear & extend gutters | $0–$50 | Prevents water pooling & foundation damage |
Apply rust-inhibiting primer | $30–$80 | Extends cladding life 5–10 years |
Add ridge vent or louvre | $40–$120 | Eliminates condensation drip inside roof |
Seal concrete floor perimeter | $20–$60 | Stops groundwater wicking under slab |
Insulate roof interior | $80–$250 | Cuts condensation & improves comfort |
Total estimated cost for all 7 fixes: $205–$660 NZD depending on shed size and materials chosen. Most fixes require basic DIY tools only.
FIX #1: Seal Roof Flashings and Panel Laps
The most common source of water ingress in a New Zealand shed isn't a hole in the roof, it's the flashing. Roof flashings are the metal strips that seal the joins between roof sheets, ridgelines, and wall junctions. Over time, the sealant under flashings shrinks, cracks, or lifts especially after several winters of thermal expansion and contraction.
What to do
Inspect all ridge, barge, and apron flashings for lifted edges or cracked sealant underneath.
Run a bead of butyl tape or roofing-grade polyurethane sealant under any lifted flashing and press firm.
At lap joints (where one roof sheet overlaps another), check for daylight when standing inside, any gap is a potential leak path.
Apply lap sealant (available from most NZ hardware stores) along any open laps.
Steel shed roofs in high-wind areas including much of Waikato, Manawatu, and coastal regions, experience more flashing movement than sheltered sites. Inspect flashings every 12 months if your shed is in an exposed location. Anchored Steel designs flashings into every structure with NZ wind zone requirements built in, but older sheds or kitsets may need more frequent maintenance.
FIX #2: Install Door Draught Seals and Bottom Seals
A shed door that doesn't seal properly is a significant winter problem, not just for comfort, but for the contents inside. Wind-driven rain enters under roller doors and bi-fold doors with worn or missing bottom seals. Personal access doors with ill-fitting frames allow constant cold air infiltration that drives up humidity and promotes condensation on tools and equipment.
What to do
For roller doors: replace the rubber bottom seal if it's cracked, compressed flat, or missing sections. These are sold by the metre at most NZ hardware stores. Cut to length and slide into the existing channel, no tools required.
For personal access doors: install a door sweep on the bottom edge, and apply foam or brush draught seal tape to the side and top jambs.
Check that the door closes squarely. Warped or twisted door frames on older wooden-framed sheds may need re-squaring before seals are effective.
For large sliding or bi-fold doors: check the brush seals at the sides and ensure the door sill has a weather bar if wind-driven rain is a regular problem at your site.
Cost tip: A full set of replacement seals for a standard roller door and a personal access door typically costs $40–$80 at a NZ hardware store. It's one of the highest-impact low-cost fixes on this list.
FIX #3: Clear, Repair, and Extend Your Gutters
Blocked gutters are the silent cause of a wide range of shed problems from water pooling against foundations and wicking under the slab, to overflow staining and rust acceleration on cladding near the eaves. In New Zealand, autumn leaf fall and wind debris mean most gutters are partially blocked by the time winter rain arrives.
What to do
Clear all gutter channels of leaves, moss, and debris before the first heavy rain.
Check downpipes are clear by flushing with a garden hose, a slow drain indicates a blockage in the pipe.
Inspect gutter brackets and confirm gutters are still pitched correctly toward the downpipe. Sagging gutters pool water and overflow onto the wall, not just over the front edge.
If your downpipes discharge directly against the shed foundation or concrete apron, add an elbow and a short extension pipe to carry water at least 500mm away from the building.
For sheds under large deciduous trees, consider gutter guard mesh as a one-time install that eliminates annual clearing.
Steel shed cladding around the eave line is the area most exposed to constant water contact. Persistent overflow from blocked gutters accelerates paint and Zincalume coating degradation, leading to rust that requires far more expensive repairs than a single gutter-clearing session.
FIX #4: Apply Rust-Inhibiting Primer to Any Corroded Cladding
Surface rust on steel cladding is the most visible sign that a shed is losing its weather resistance. In New Zealand particularly in coastal areas, high-rainfall regions, or paddocks where chemical overspray is common, paint and metallic coatings degrade faster than inland or urban sites. Catching surface rust early is dramatically cheaper than replacing panels later.
What to do
Inspect all cladding sheets for rust spots, especially around cut edges, fastener heads, and any area where the paint coating has been scratched or chipped.
Wire-brush or sand rust spots back to bare metal.
Apply a rust-inhibiting primer (zinc-based or epoxy) rated for exterior metal use. Allow to fully cure before applying a topcoat.
Recoat fastener heads that have lost their coating, this is one of the most common overlooked rust initiation points on steel sheds.
For any panel where rust has penetrated through the sheet, replacement is the correct solution, surface treatment over through-rust does not hold long-term.
Anchored Steel uses NZ-made Galvsteel® framing with a 50-year durability statement but even the best steel needs periodic inspection in harsh NZ environments. Building in an annual visual check saves significantly on long-term maintenance costs.
FIX #5: Add a Ridge Vent or Louvre to Reduce Condensation
Condensation dripping from the inside of a shed roof is one of the most common winter complaints for NZ shed owners and one of the least understood. It isn't a leak. It's water vapour from inside the shed (warm, moist air from the ground, stored materials, or heated activities) rising to the cold roof surface and condensing into droplets.
The solution is ventilation: getting air moving through the roof space so warm moist air escapes before it condenses. A ridge vent or wall-mounted louvre does this passively, with no moving parts and no ongoing cost.
What to do
Assess your current ventilation: does your shed have any vents in the roof or upper walls? Most basic shed builds have none.
Install a ridge vent (a perforated or louvred strip along the peak of the roof) if access to the roof allows. Prefabricated ridge vent inserts are available for standard corrugated profiles.
For simpler installation, add louvre vents in the upper gable walls at each end of the shed. These can be cut in and fixed with basic tools.
If condensation is severe, a roof insulation blanket (Fix #7 below) combined with ventilation is the most effective combined solution.
Why is water dripping from my shed roof inside? Water dripping from the inside of a shed roof in NZ winter is almost always condensation, not a leak. Warm, moist air rises to the cold metal roof surface and forms water droplets. The fix is ventilation (ridge vent or louvre) to allow moist air to escape, and/or insulation to keep the roof surface warmer. It is not caused by a hole in the roof.
FIX #6: Seal the Concrete Floor Perimeter
Water doesn't only enter a shed from above, it also wicks up through the concrete slab from below and enters through the joint between the slab edge and the wall base. In winter, this creates persistent dampness on the floor that corrodes stored equipment, damages timber, and makes the shed interior feel cold and clammy.
What to do
Inspect the joint between the concrete slab and the base of each wall. This joint cracks over time as the slab moves slightly relative to the wall framing.
Clean the joint with a wire brush and blow out any loose material.
Apply a flexible polyurethane or silicone sealant rated for concrete-to-metal or concrete-to-timber joints. Do not use standard paintable caulk, it will crack within one season.
For sheds with consistently damp floors in winter, a penetrating concrete sealer applied to the slab surface significantly reduces moisture wicking from below.
Ensure stormwater and surface runoff cannot pool against the shed perimeter. Re-grade the surrounding ground or add a gravel drainage strip if water consistently runs toward the building.
FIX #7: Insulate the Roof Interior
Of all seven fixes on this list, roof insulation has the highest impact on winter comfort and the widest cost range depending on approach. Even a basic foil-backed insulation blanket installed under the roof sheets dramatically reduces condensation, makes the space warmer for working in, and protects anything stored against temperature fluctuations.
Options from low to higher cost
Foil-faced bubble wrap insulation ($1.50–$3.00/m²): Budget option. Reduces radiant heat transfer and condensation risk. Best for unheated storage sheds.
Roof insulation blanket (glasswool or polyester, $3–$8/m²): Mid-range. Significantly better thermal performance. Compresses at purlins so installation should run the blanket over the top of purlins rather than sagging between them.
Rigid PIR/PUR foam board ($8–$20/m²): Best performance. Used in workshop or habitable shed spaces. Requires more careful installation but provides the best R-value per mm of thickness.
Installation notes
In new sheds, insulation blanket is typically installed between roof purlins and cladding at the time of construction, this is the cleanest method.
For retrofitting into an existing shed, foil insulation or rigid board can be fixed to the underside of purlins with a staple gun and washered screws.
Ensure any insulation product is suitable for the application (unventilated roof space, exposure to condensation).
When to upgrade rather than insulate. If your shed roof sheets are corroded, badly dented, or heavily faded with exposed substrate, insulating over them locks in the problem and delays the inevitable. At that point, a professional assessment from a shed contractor like Anchored Steel is more cost-effective than continued patching. Re-roofing or re-cladding a steel shed can often be done at a fraction of the cost of a full rebuild.
When Budget Fixes Aren't Enough: Signs You Need a New Shed
These seven fixes work well on structurally sound sheds with cosmetic or sealing issues. But there are situations where ongoing patching costs more than replacing and where the contents of your shed are worth more than the shed itself.
Signs that a professional assessment or shed replacement is the right call:
Rust has penetrated through cladding sheets in multiple locations, especially near the base.
Roof sheeting is corrugated or buckled from hail, wind, or age — indicating structural deflection in purlins.
Wall columns or base channels show visible corrosion or are out of plumb.
The shed moves or flexes noticeably in high winds, suggesting the frame is no longer performing as designed.
Persistent floor water despite sealing suggests a subfloor drainage or slab failure issue.
If your shed is showing signs of structural decline, Anchored Steel offers a free consultation and quote for new steel shed builds across Waikato and the Central North Island. Their team can assess whether a targeted repair, a re-clad, or a full replacement is the most cost-effective path for your property.
Frequently Asked Questions: Sheds in NZ & Waikato Winter
How do I stop my shed from leaking in winter in NZ?
The most common causes of shed leaks in NZ are failed roof flashing sealant, open panel laps, and blocked gutters causing overflow. Start by inspecting all flashings and ridge caps for lifted edges or cracked sealant, then check panel laps from inside the shed on a bright day for daylight gaps. Apply butyl tape or roofing sealant to any open joints. Clear gutters and ensure downpipes are draining freely.
Why is water dripping from inside my shed roof?
Dripping from inside a shed roof is almost always condensation, not a leak. Warm, moist air inside the shed rises to the cold metal roof surface and forms water droplets. Fix it by improving ventilation (ridge vent or gable louvres) and/or insulating the roof interior. This is a very common NZ winter shed problem and does not require re-roofing.
Do I need building consent for a shed in NZ?
Building consent requirements for sheds in New Zealand depend on the size and intended use. Generally, farm sheds under 10m² may be exempt, but sheds used as habitable spaces, those over certain dimensions, or those in specific zones require consent. Anchored Steel manages the consent process for all its custom builds as part of its six-phase project delivery.
How long do steel sheds last in New Zealand?
A professionally built steel shed in NZ can last 30–50 years or more with routine maintenance. Anchored Steel backs their NZ-made steel and Galvsteel® framing with a 50-year durability statement. Lifespan depends on site conditions, maintenance frequency, and exposure — coastal or high-rainfall sites require more regular inspection and surface treatment.
Where can I get a steel shed builder near me in Waikato?
Anchored Steel is a Waikato-based steel shed builder servicing the Central North Island. They provide free consultations and quotes for lifestyle, farm, industrial, and commercial shed projects. Call 027 827 4223 or visit anchoredsteel.co.nz to enquire.
Is it worth insulating a shed in NZ?
Yes, especially if the shed is used as a workshop, studio, or space where condensation is a problem. Even a basic foil insulation blanket under the roof sheets reduces condensation drip significantly. For heated or habitable shed spaces, glasswool or rigid foam insulation delivers meaningful energy savings and comfort improvement over a Waikato winter.
What is the best shed cladding for wet NZ conditions?
Steel cladding with a high-quality metallic coating — such as Zincalume or Colorsteel — is the most durable cladding for wet NZ conditions. Anchored Steel uses premium steel products rated for New Zealand's climate. For coastal or high-humidity sites, a higher-specification coating grade is recommended. Timber cladding requires more frequent maintenance and is not recommended for exposed rural or coastal sites.
How much does a new steel shed cost in New Zealand?
Steel shed prices in NZ vary significantly based on size, design, site conditions, and specification. Smaller lifestyle sheds may start from $15,000–$30,000 installed, while large farm or industrial sheds are higher. Since every Anchored Steel build is custom-designed, a free quote is the most accurate way to get a price for your project. Contact Anchored Steel at anchoredsteel.co.nz or call 027 827 4223.
Ready to Fix Your Shed or Build a Better One?
The seven fixes in this guide will protect most NZ sheds through another winter at minimal cost. But if your shed is past the point of patching or if you're planning a new build, Anchored Steel offers free consultations for custom steel shed projects across Waikato and the Central North Island.
Anchored Steel designs and builds lifestyle, farm, industrial, and commercial sheds engineered specifically for New Zealand's climate. Every structure comes with site-specific engineering, NZ Building Code compliance, and the K5S® bracket system for precision and strength.
📞 Call: 027 827 4223
✉️ Email: info@anchoredsteel.co.nz